Walk In Closet Vanity Charlotte: Heights and Light
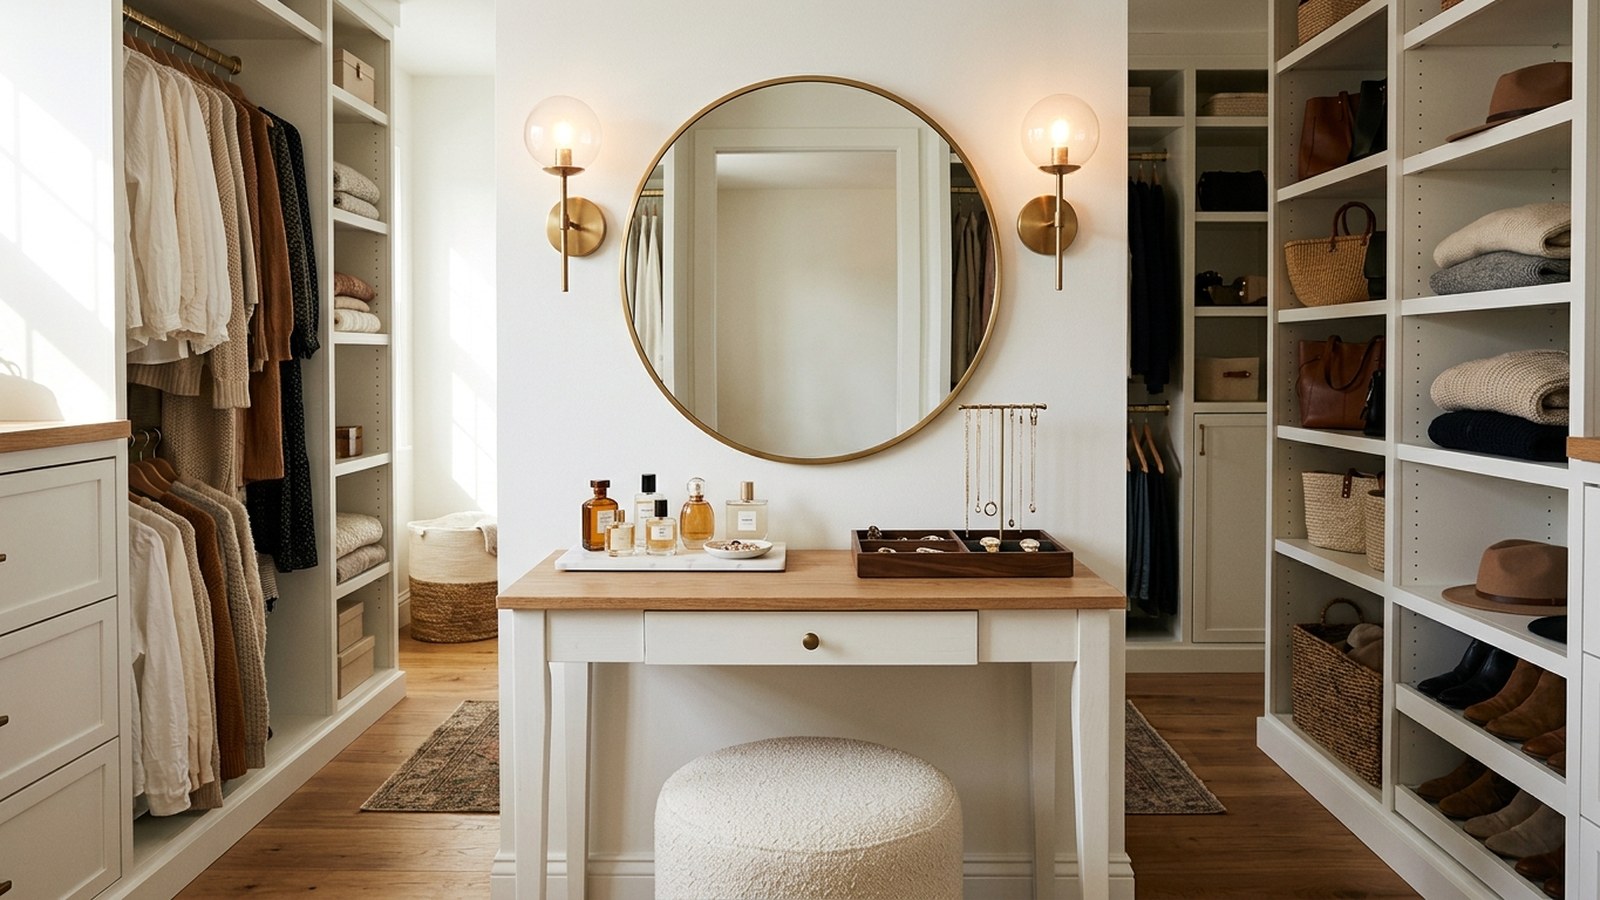
A walk-in closet vanity works when you treat it as a small room with a job: good light on the face, a counter height that matches how you sit or stand, and clear space to move between storage and the dressing nook. Plan the sequence carefully. Measure traffic and power first, set the counter and seat heights second, place lighting third, then fit drawers, jewelry trays, and hanging around that core. Trade guidance for vanity fixtures commonly places an above-mirror bar near 75 to 80 inches from the floor, or sconces near eye level, so faces are lit from the sides rather than shadowed from overhead.[1][2]
Why Charlotte walk-ins earn a dedicated vanity
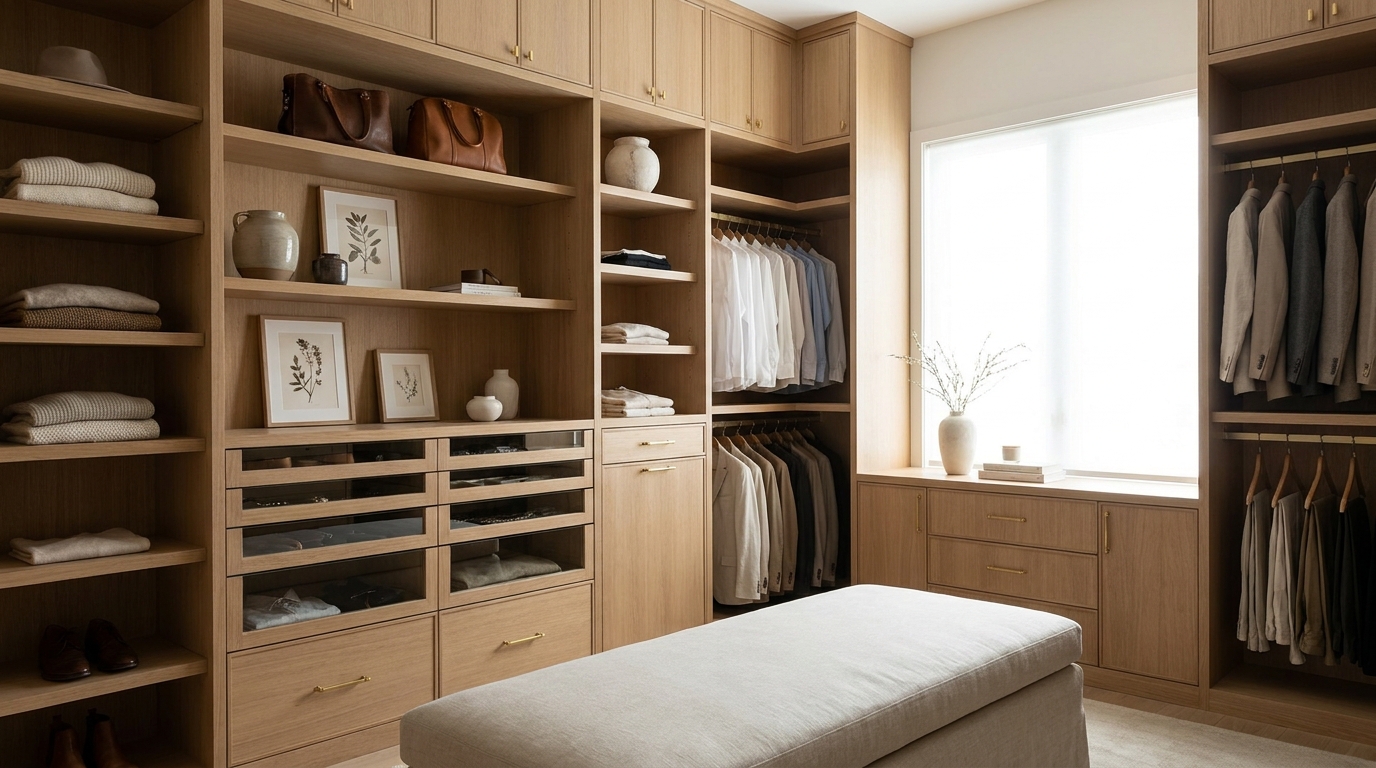
In Charlotte-area homes from Ballantyne to Fort Mill and Indian Trail, primary suites often have walk-ins large enough for more than rods and shelves. A getting-ready zone inside the closet keeps hair tools, makeup, and jewelry out of a crowded bath, and it frees the bathroom counter for sinks and daily storage. That only works if the nook is designed as carefully as the closet walls around it.
A walk in closet vanity charlotte homeowners actually use day after day is not a leftover corner with a mirror taped to the wall. It is a planned station with task light, outlets where chargers and tools live, a surface deep enough for products without crowding elbows, and a seat that tucks away when someone needs the full aisle. When those pieces are ordered wrong, the nook becomes a dead zone. When they are ordered right, the rest of the closet finally feels calm.
We design custom walk-ins for real morning routines, not catalog photos. That means asking who gets ready here, how long they sit, whether a second person needs standing mirror space nearby, and whether electrical work will need a permit when circuits or receptacles are added. In Mecklenburg County, alterations that change or extend electrical systems are among the projects that require permits through local code enforcement.[3]
Design sequence that protects the plan
Skip the pretty finishes until the bones of the zone are set. We follow a fixed sequence so lighting and seating do not fight the storage later.
1. Map the walk path and the “stop” zone
Start with a floor sketch of the walk-in. Mark the door swing, the main aisle, and any second exit. The vanity needs a stop zone: a place where a chair can pull out without blocking the main path when someone is hanging a shirt or pulling a drawer. If the chair blocks the only path when it is in use, the nook will annoy everyone who shares the suite.
Leave enough clear floor for the chair to roll or slide back. A dressing nook that looks generous on paper can feel tight once double hang rods and a full-height mirror go in. If the footprint is tight, a wall-mounted flip-down seat or a narrow bench that tucks under a knee space is often smarter than a freestanding stool that always lives in the aisle.
2. Decide seated, standing, or hybrid
Counters come in two common families for vanity work. Standing bathroom vanities often fall in a standard range around 30 to 34 inches floor to countertop, with comfort-height options around 34 to 36 inches, closer to kitchen counters.[4] Seated makeup tables are usually lower. Many seating-focused guides land near 28 to 30 inches so forearms rest near elbow height when you sit.[5]
Pick one primary posture and design to it:
- Seated primary: Lower counter, open knee space, stool or chair with a back if sessions run long.
- Standing primary: Higher counter, full-length mirror nearby, no chair permanently in the zone.
- Hybrid: Seated surface for detail work plus a separate full-length dress mirror on another wall so outfit checks do not fight the makeup light.
Mixing heights on one continuous top without a clear break usually fails. People end up standing at a low counter or sitting at a high one, and both feel wrong by week two.
3. Lock knee clearance and seat choice before drawers
If the station is seated, protect the knee space before you fill the base with drawers. Under-desk guidance for seated work commonly calls for leg clearance in the range of about 20 to 28 inches high under the work surface, with the area under the top kept free of clutter so postures can change.[6] A deep drawer bank right where thighs need to go turns a pretty vanity into a standing shelf with a chair in the way.
Pair the counter with a seat height that matches. Too-tall stools force shoulders up. Too-low stools leave wrists bent at the counter edge. Round or eased front edges reduce contact stress on forearms during longer sessions, which is a small detail that matters more than hardware style.
4. Place lighting for faces, not for the ceiling
Overhead closet lights alone are a poor makeup source. Downlight from the ceiling throws shadows under brows, noses, and chins. Task light at the mirror is the fix.
For fixtures above a mirror, industry hang heights often put the bar mounting zone around 75 to 80 inches from the finished floor.[1][2] Some manufacturer guides place the fixture centerline near 72 inches, rising toward 80 inches for taller users, without exceeding that upper distance.[10] Side sconces are often preferred for grooming because light hits the face from both sides. Guidance for side fixtures frequently places them roughly 60 to 70 inches from the floor, spaced to frame the mirror rather than sit far outside the face zone.[1][2]
Brightness and color quality matter as much as height. For vanity task zones, the American Lighting Association’s roughly 1,600-lumen total for the vanity area is a common planning target (for example, a pair of sconces near 800 lumens each, or one bar that delivers the full total).[2] Designers often recommend color temperatures around 2700K to 3000K for flattering warm white, with cooler neutral light in the mid-3000s to 4000K when color matching makeup or clothing is the priority.[2] Color rendering also counts. ENERGY STAR-qualified light bulbs must reach a color rendering index (CRI) of 80 or greater, and for face work many lighting guides push toward CRI 90 or higher so skin tones and product colors read true.[2][7]
Layer the rest of the closet separately. Ambient aisle light helps you find shoes. LED strips in hanging bays help you see fabric. Neither replaces face-level task light at the vanity. Put the vanity lights on a dimmer so early mornings and late nights can use different levels without changing fixtures.
5. Plan power and cord paths with the electrician, not after the install
Hair tools, chargers, lighted mirrors, and steamers need outlets where cords will not cross the knee space or the main aisle. In bathrooms, the National Electrical Code framework summarized by electrical educators requires at least one receptacle within about 3 feet of each sink basin, with GFCI protection for bathroom receptacles.[8][9] A dry closet vanity is not always under the same bathroom rules as a wet vanity, but the habit of placing power near the work surface still applies, and any new circuits or extended wiring in the Charlotte metro typically go through licensed electrical work and local permitting where required.[3]
Practical outlet rules we use on closet vanities:
- At least one duplex at counter height for tools in use.
- A second outlet or USB-ready location for phones and tablets so charging cables do not fight the hair dryer.
- Keep receptacles off the face-up counter surface where liquids or powders collect.
- Run switch locations so you can light the nook without walking the full length of the closet in the dark.
If the walk-in is far from the bath panel or already full of shared circuits, flag that early. Adding capacity mid-project costs more than wiring the vanity wall before drywall closes.
6. Build storage around the station, not through it
Once the seat, counter, light, and power are fixed, fill the walls. Shallow drawers for makeup and skincare sit closest to the seat. Deeper drawers for hair tools go beside, not under, the knee space. Vertical trays for jewelry and watches keep small pieces off the open counter so the surface stays a work zone, not a catch-all.
Hang space should stay out of the swing of the chair and out of the light path to the face. A full-length mirror belongs where you can step back without climbing over the stool. If two people share the suite, give the standing dress check its own wall so the seated vanity does not become a traffic jam every weekday morning.
Counter depths, mirrors, and finishes that survive daily use
Depth is a frequent miss. Too shallow and bottles tip. Too deep and you lean forward for every product. Most seated vanities work well in the mid-teens to low twenties of inches deep, with enough free surface in front of the mirror for hands and tools. Leave a small landing zone beside the main work area for a coffee mug or phone so those items do not migrate into the makeup tray.
Mirrors: a framed or frameless vertical mirror sized to the face zone is enough for seated work. Add a separate full-length panel for outfits. Lighted mirrors can work when glare is controlled and the light quality meets the same CRI and color-temperature goals as wall fixtures.[2] Avoid relying only on a distant mirror at the far end of the closet; the walk back and forth breaks the routine you were trying to simplify.
Finishes in a closet vanity take heat, products, and abrasion. Choose closed-pore counter materials that wipe clean, hardware that does not catch clothing, and drawer interiors that can be wiped after powder spills. Soft-close hardware is not a luxury here. It keeps late-night drawers quiet when someone else is still asleep.
Lighting mistakes we fix most often
These patterns show up in older walk-ins across the Charlotte market:
- Ceiling cans only. Faces look tired in photos and in the mirror. Add side light or a properly mounted bar.
- Fixture wider than the mirror. Proportions feel off and light spills past the face zone. Keep the fixture within the mirror width.[10]
- One shared light for two stations. If two people get ready at once, each station needs its own task source rather than one bar in the middle.[2]
- Cool, low-CRI bulbs. Makeup that looked right at home looks wrong in daylight. Spec high CRI and a color temperature you test in person.[2][7]
- No dimming. Full task brightness at 5 a.m. is harsh. Dim for evenings without losing the ability to go bright for detail work.
How large does the nook need to be?
There is no single square-foot rule, but the zone needs three things: a counter span wide enough for both hands, room for the chair to pull back, and enough wall for light and a mirror. A slim nook can work at roughly desk width if storage is vertical and the aisle stays clear. Larger primary walk-ins can dedicate a full wall bay to a vanity with drawers on both sides, as long as the main circulation path remains obvious.
If the walk-in is long and narrow, put the vanity on a short wall so the chair backs into a corner rather than into the center aisle. If the walk-in is more square, a side wall bay often feels more private and keeps hanging runs continuous on the longer walls.
Local process: consult, measure, wire, install
Our process for a walk in closet vanity charlotte clients request usually looks like this:
- In-home consult. We measure the suite, note door swings, and talk through seated vs standing habits.
- Layout. We place the nook where light, power, and traffic make sense, then build hanging and shelving around it.
- Electrical coordination. If new receptacles, switches, or circuits are needed, we coordinate with licensed electrical work and local permit rules before cabinetry locks the wall.
- Material and lighting choices. Counters, hardware, and fixtures are selected together so finishes and light color agree.
- Install and adjust. Drawers, mirrors, and seating are set so the first real morning routine reveals any small tweaks early.
We design custom walk-in closets across the Charlotte region with the same practical standard: every zone should earn its square footage. A vanity that looks styled but fails at 7 a.m. is not a luxury. It is wasted space.
Practical takeaways
- Sequence the project: path and power first, counter and seat heights second, face lighting third, storage last.
- Choose seated (about 28-30 inches) or standing comfort height (often mid-30s) on purpose; do not split the difference on one unbroken top.[4][5]
- Mount vanity task light for the face: above-mirror bars often near 75-80 inches from the floor, side sconces often near 60-70 inches.[1][2]
- Plan for roughly 1,600 lumens of vanity-area light, warm-to-neutral color temperature, and high CRI (ENERGY STAR bulbs start at 80 CRI; face work benefits from higher).[2][7]
- Keep knee space open under a seated vanity; under-surface leg clearance commonly falls in the 20-28 inch high range for seated work surfaces.[6]
- Place outlets at the work surface and confirm electrical alterations with licensed work and Mecklenburg-area permitting when systems change.[3][8][9]
- Give dress checks a full-length mirror on a separate wall so the chair and the outfit path do not compete.
How we can help
If you want a getting-ready zone that fits how you actually use your suite, we can map the walk-in, set heights and lighting, and build the storage around a vanity that works every morning. Book a free in-home design consultation or call (704) 604-3870. We serve Charlotte and nearby communities with custom closets designed for real homes, not showroom stages.
Citations
- Robern - "How High You Should Hang a Bathroom Mirror Over Vanity" (2023)
- Lumens / The Edit - "Best Bathroom Vanity Lighting: Placement, Brightness & Style" (2026)
- Mecklenburg County Code Enforcement - "Permitting" (accessed 2026)
- Elle Decor - "The Bathroom Vanity Height Guide That Will Save Your Back" (2025)
- Lumina Pro - "Makeup Vanity Table Dimensions: Height, Depth & Width Guide" (2025)
- OSHA - "Computer Workstations eTool: Desks" (accessed 2026)
- U.S. Department of Energy (FEMP) - "Purchasing Energy-Efficient Light Bulbs" (accessed 2026)
- Mike Holt Enterprises - "Receptacles in Dwellings, based on the 2017 NEC" (accessed 2026)
- Expert CE - "Bathroom Outlets: Code Rules, GFCI Placement & Spacing" (2025)
- Kichler Lighting - "Bathroom Lighting Planning & Selecting Tips" (accessed 2026)